
So, someone gave you some sourdough starter and now you feel the need to try to make bread. And you should… because it’s a great experience and there is no better way to learn that £4 for a loaf from a bakery is a bargain. Joking aside, it’s not really that hard and although there is a long elapsed time (spoiler… it takes a few days) there isn’t that much active work involved and having your own fresh sourdough is a real treat.
What you will need
Before you start this adventure, make sure you have:
- a kitchen scale
- at least one small glass jar with a lid – weigh it empty and write down how much it weighs
- white and wholemeal bread flour – it’s important to have “bread flour” and not just regular flour
- a proofing basket or banneton – you could just use a mixing bowl, but if you want the nice pattern on your loaf, you’ll need a banneton
- a heavy crockpot that you can put in the oven – a Le Creuset crock pot works well if you have it
Maintaining your starter
Your starter will survive in the fridge for weeks without any attention. This is good. It means you can still go on holiday, forget to bake, and have a normal life. If I’m not planning to bake, I take mine out once per week, let it warm up for an hour or so, feed it, leave it out for a few hours and then put it back in the fridge. I pretty much follow the Refrigerator Maintenance method from Food52.
The biggest thing to get used to is discarding most of your starter every time you feed it. Yes, that’s right you need to get rid of most of it. You can throw it out or you can put it in another container and keep it in the fridge and make other yummy things from it like these Banana Nut Muffins or Pancakes. Or you can put it in another container in the fridge and then once in a while just throw it all out at once – this is what I typically do. Although I have had those muffins and they are amazing!
Feeding your starter
Feeding your starter means discarding most of it and giving it more flour and water. I keep 30g of starter and add 30g of water (I use previously boiled and cooled tap water) and 30g of white bread flour. I find this means I don’t have to waste too much flour week to week and I have more than enough starter to make one loaf of bread (the Food52 recipe takes 10g of starter).
If you know how much your jar weighs, this process is much easier. Get out your scale and put your jar on it. Next you’ll want to scoop or pour out starter until you have the weight of the jar + 30g remaining. Tare the scale and add 30g of water. Stir until dissolved and smooth. Tare the scale and add 30g of flour. Stir until smooth. Leave on counter for a few hours until it’s bubbly. If you’re not baking this week, return it to the fridge until next week.
Making your bread
I follow the Table Loaf recipe from Food52. The video is a great way to see how to actually do the various techniques and her voice is so soothing to listen to.
Timeline
Day 1: Take starter out of fridge sometime in the morning, let it warm up, feed it and leave on counter. Feed again in evening.
Day 2: Feed starter sometime around midday. Make leaven in the evening (step 1 from the Table Loaf recipe).
Day 3: Make the dough (steps 2 to 5 from the Table Loaf recipe).
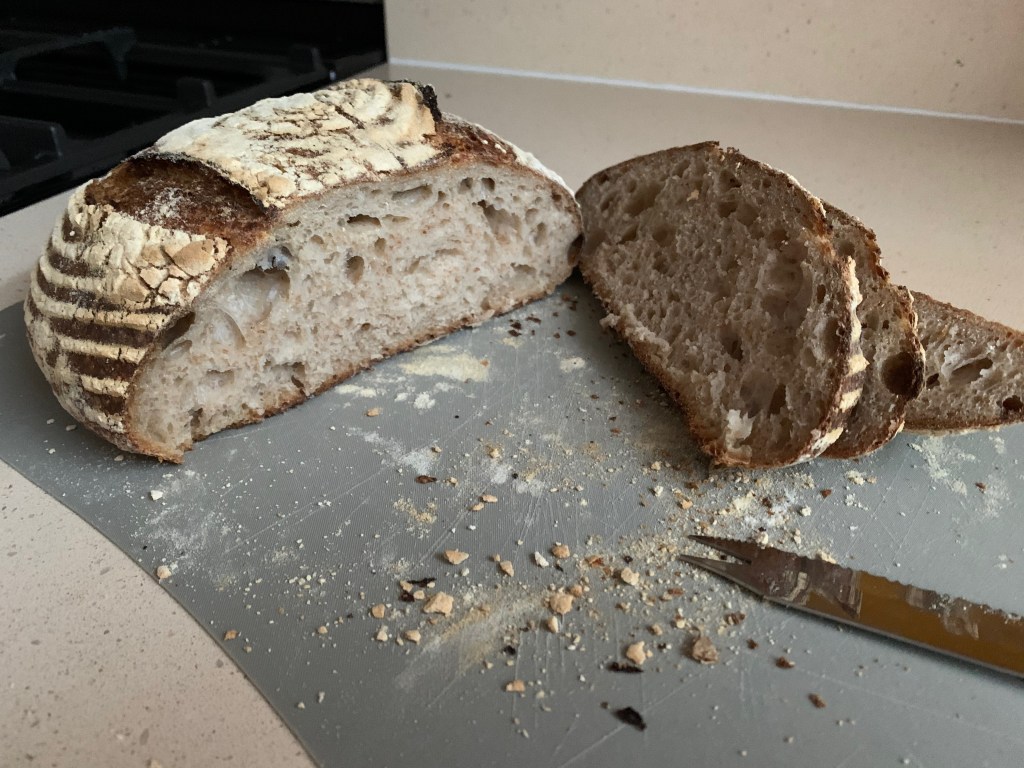
Day 4: Bake. Be sure to let your loaf cool for at least 2 hours to allow the crumb to form properly.

Leave a comment