Feeds:
Posts
Comments

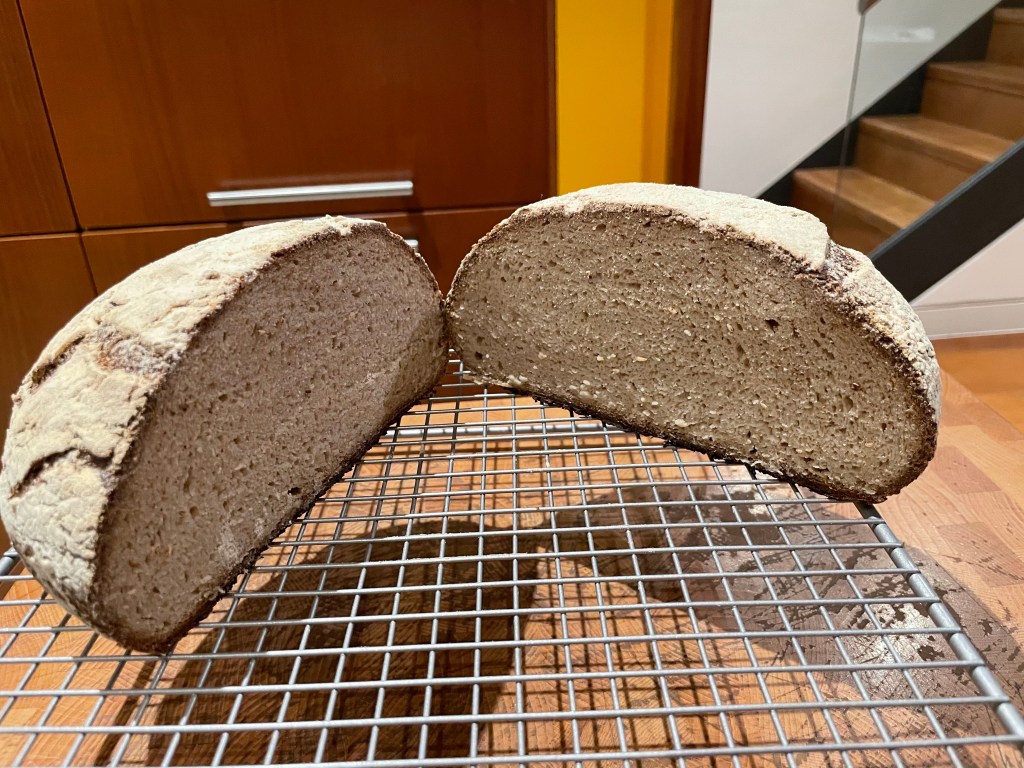
Gluten Free Sourdough Bread

My project for Lockdown 3.0 was to master gluten free sourdough. I had been making sourdough since the first lockdown but my husband had never been able to enjoy it because he has a gluten intolerance. I thought it would be a fun challenge to make a gluten free version, but also thought why not give it a try!

Although many of the principles and processes for GF sourdough are the same as for traditional sourdough (see How to Sourdough for details on equipment and starter maintenance) there are a few key points that differ:

  1. The flours used need to be gluten free and you’ll need more different kinds – I use white rice, teff, quinoa, sorghum and tapioca + psyllium husk
  2. No need to pull and fold – just wait!
  3. No gluten means everything is so much easier to clean up!

Starter

As with a gluten-based sourdough, you’ll need a starter. This part takes a few days (possibly up to a week depending on the flours you use and the temperature you keep your starter at). I used this Guardian article and the freee Guide to Gluten Free Sourdough Making as resources and settled on a mix of three flours:

10g white rice flour
10g teff flour
10g quinoa flour
30g water – I use tap water that has been boiled and cooled

Mix in a glass (or plastic) jar and put in a warm place. As per the Guardian article, repeat the feeding and discarding daily until you start to see bubbles. After baking, I keep the leftover starter in the fridge until I want to bake again – taking it out the morning of the day before I want to bake, feeding it once and then giving it a big feeding at 5:30pm. It’s important to make sure you have enough starter to make the pre-ferment as well as have some leftover so you don’t have to start from scratch every week. I target around 200g of starter before baking.

Bread

I follow the recipe from the Guardian or the original on georgeats.com (which also has loads of resources and information on it) but I increase the quantities by 50% to get a bigger loaf.

Advertisement

How to Sourdough

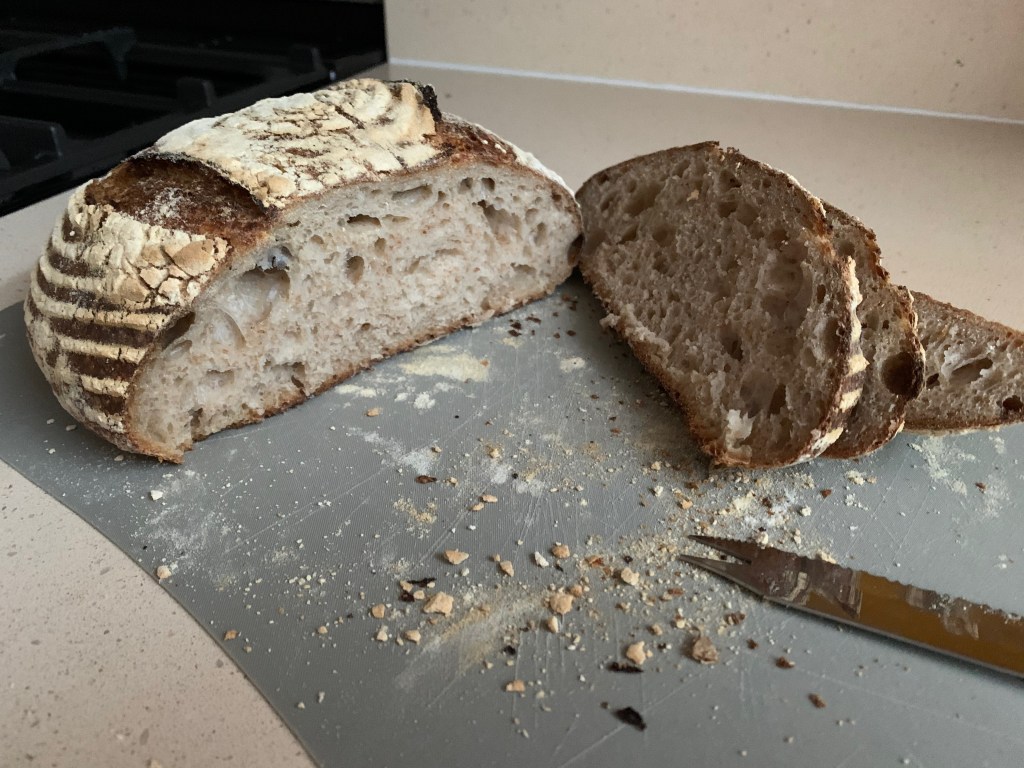
So, someone gave you some sourdough starter and now you feel the need to try to make bread. And you should… because it’s a great experience and there is no better way to learn that £4 for a loaf from a bakery is a bargain. Joking aside, it’s not really that hard and although there is a long elapsed time (spoiler… it takes a few days) there isn’t that much active work involved and having your own fresh sourdough is a real treat.

What you will need

Before you start this adventure, make sure you have:

  • a kitchen scale
  • at least one small glass jar with a lid – weigh it empty and write down how much it weighs
  • white and wholemeal bread flour – it’s important to have “bread flour” and not just regular flour
  • a proofing basket or banneton – you could just use a mixing bowl, but if you want the nice pattern on your loaf, you’ll need a banneton
  • a heavy crockpot that you can put in the oven – a Le Creuset crock pot works well if you have it

Maintaining your starter

Your starter will survive in the fridge for weeks without any attention. This is good. It means you can still go on holiday, forget to bake, and have a normal life. If I’m not planning to bake, I take mine out once per week, let it warm up for an hour or so, feed it, leave it out for a few hours and then put it back in the fridge. I pretty much follow the Refrigerator Maintenance method from Food52.

The biggest thing to get used to is discarding most of your starter every time you feed it. Yes, that’s right you need to get rid of most of it. You can throw it out or you can put it in another container and keep it in the fridge and make other yummy things from it like these Banana Nut Muffins or Pancakes. Or you can put it in another container in the fridge and then once in a while just throw it all out at once – this is what I typically do. Although I have had those muffins and they are amazing!

Feeding your starter

Feeding your starter means discarding most of it and giving it more flour and water. I keep 30g of starter and add 30g of water (I use previously boiled and cooled tap water) and 30g of white bread flour. I find this means I don’t have to waste too much flour week to week and I have more than enough starter to make one loaf of bread (the Food52 recipe takes 10g of starter).

If you know how much your jar weighs, this process is much easier. Get out your scale and put your jar on it. Next you’ll want to scoop or pour out starter until you have the weight of the jar + 30g remaining. Tare the scale and add 30g of water. Stir until dissolved and smooth. Tare the scale and add 30g of flour. Stir until smooth. Leave on counter for a few hours until it’s bubbly. If you’re not baking this week, return it to the fridge until next week.

Making your bread

I follow the Table Loaf recipe from Food52. The video is a great way to see how to actually do the various techniques and her voice is so soothing to listen to.

Timeline

Day 1: Take starter out of fridge sometime in the morning, let it warm up, feed it and leave on counter. Feed again in evening.

Day 2: Feed starter sometime around midday. Make leaven in the evening (step 1 from the Table Loaf recipe).

Day 3: Make the dough (steps 2 to 5 from the Table Loaf recipe).

Day 4: Bake. Be sure to let your loaf cool for at least 2 hours to allow the crumb to form properly.

The Dysart Arms


Place setting at The Dysart Arms

Place setting at The Dysart Arms

The Dysart Arms
135 Petersham Rd
Richmond
TW10 7AA
T: 020 8940 8005
Map

I read about this wonderful Gastropub on the edge of Richmond Park in a tweet by Andy Hayler last week. Today we decided to go for a spontaneous Sunday lunch and it was definitely a good idea! Everything on the menu looked fantastic and many dishes had recommended matching wines, which is always nice! We finally decided on the Parsnip soup with coconut and lime foams and the Orkney scallop with squid ink dumplings and Insolia veloute, which were both served in bowls on wooden boards and were very tasty! For the main course we both had the Longhorn beef, which was served on a sharing plate in the centre of the table and came with some wonderful side dishes: potato and pancetta pithivier, Grelot onions, salt roast beetroot with toasted  hazelnuts and miso(!) horseradish. We chose the matching wines for both courses which were Bacchus and Chablis with the starters and Azamor, a Portuguese Syrah-Merlot blend with the beef.  After spotting Pedro Ximenez sherry as the matching wine for the Chocolate and praline bar with miso salted ice cream, we couldn’t resist having dessert as well…and it was pouring rain so we needed an excuse to wait it out! We also tried the Pandan creme brulee with a peanut butter cookie with a glass of Late Harvest Torrontes.  All in all it was probably the best Sunday lunch I’ve ever had. Definitely somewhere to go back to.

Chocolate and praline bar with miso salted caramel ice cream.

Chocolate and praline bar with miso salted caramel ice cream.

View from The Dysart Arms

View from The Dysart Arms

Parsnip soup with coconut and lime foams.

Parsnip soup with coconut and lime foams.

Orkney scallop with squid ink dumplings and Insolia veloute

Orkney scallop with squid ink dumplings and Insolia veloute

Victim Cookies

Adapted from Baking Bite’s Vampire Cookies, these victim cookies are fun to make and popular with hungry guests!


Victim Cookies

3/4 cup butter softened
1/2 cup sugar
1 large egg
1/2 teaspoon vanilla extract
1/8 teaspoon almond extract
1 1/2 cups all purpose flour
1/4 teaspoon salt
red food colouring

In a large bowl, cream together butter and sugar until light. Beat in egg and extracts.

Add flour and salt to the bowl and mix them into the butter-sugar mixture at low speed until dough is just combined. Wrap dough in plastic wrap and refrigerate for at least 1 hour.

Preheat oven to 350°F/175°C.

Divide dough in half and keep the portion you are not using in the refrigerator.

Roll out the dough directly onto the baking sheet liner.

Roll dough out on a lightly floured surface until it is about 1/8-inch thick. Use a cookie cutter to cut out human shapes and place them on a baking sheet. Or, if you are lucky enough to have a Silpat or other non-stick baking sheet liner, roll the dough out right onto it, cut out your cookies and then peel away the unused dough. I’ve found this means much less wastage because the delicate cut-outs don’t need to be moved.

Bake for 8-10 minutes, until cookies are starting to brown.

Cool for about 5 minutes on the baking sheet, then transfer to a wire rack to cool completely.

Pour out a small amount of red food colouring into a shallow dish. Dip a toothpick in the food colouring and drag across the cookies making injury-like marks.

Cookies will keep for up to a week in an airtight container.

Meringue Ghosts

These little ghosts are adorable, easy to make and super-tasty! Credit for the recipe goes to SkinnyTaste.


Meringue Ghosts

Makes 36

Preheat oven to 400°F/200°C. Place rack in the center of the oven. Line a baking sheet with parchment paper. Have a pastry bag fitted with a 1/2 inch plain tip.

The little beauties!

4 large egg whites, room temperature
1/4 tsp cream of tartar
1 cup superfine sugar (or put sugar in food processor for 30 seconds until fine)
1/2 tsp pure white vanilla extract
miniature chocolate chips for the eyes

In your mixing bowl, using the whisk attachment, beat the egg whites on low-medium speed until foamy. Add the cream of tartar and continue to beat until you get very stiff peaks. Beat in vanilla extract.

Add the sugar, a little at a time, and continue to beat until the meringue holds very stiff peaks. Beat in the vanilla extract.

Before placing the meringue ghosts on the cookie sheet, place a little of the meringue on the underside of each corner of the parchment paper to prevent the paper from sliding.

Transfer the meringue to the pastry bag. Holding the bag perpendicular to the baking sheet, pipe with even pressure, 2 inch high mounds of meringue.

Carefully press two miniature chocolate chips into each meringue ghost for the eyes, and a third chip for a mouth.

Bake the meringues for approximately 1 1/4 – 1 1/2 hours or until they are dry and crisp to the touch and easily separate from the parchment paper. Turn off the oven, slightly open the door, and leave the meringues in the oven to finish drying several hours, or even overnight.

Keeps for several days at room temperature.

Nutritional Info: Size: 1 ghost
Old Points: 1 pts
Points+: 1 pts
Calories: 27.5
Fat: 0.3 g
Protein: 0.4 g
Carb: 6.1 g
Fiber: 0.1 g
Sugar: 5.9 g
Sodium: 6.4 mg

Tom Aikens

Tom Aikens
43 Elystan St
London
SW3 3NT
T: 020 7584 2003
Map

It was pouring rain on Friday night when we arrived at Tom Aikens and we were welcomed with offers to take our coats and wet clothing and quickly shown to our table. Although the tasting menu looked wonderful, we thought we’d go a la carte and try to avoid over-indulging.

After a Sipsmith’s Gin and Tonic, we started with the Housemade Ricotta with Green Olive Juice, Honey Jelly and Pine Nuts and the Marinated Foie Gras with Beetroot & Port, Pickled Raisins and Dried Plums, which were both delicious. Having made our own cod with vanilla butter, we had to try Tom’s Roast Cod with Confit Carrots, Vanilla Butter and Ham Hock and it did not disappoint. Our other choice for main course was the Partridge with Roast Pear, Chocolate and Foie Gras Mousse, which was also fantastic. To finish off we had a cheese platter and the Pistachio Brick with Caramelised Pistachio and Pistachio Milk, which was unique, yummy and very light.

We thoroughly enjoyed our evening at Tom Aikens and can’t wait to go back. The food was very tasty, fantastically presented and not in the slightest bit pretentious, which is rare for a high-end London restaurant. Yes, there were the gels and powders common in modern gastronomy, but there was none of the usual snobbiness.  To top the evening off, we just happened to run into Tom himself on our way out and were able to thank him in person for a wonderful evening and fantastic food.

St John Hotel

St John Hotel
1 Leicester St
London
WC2H 7BL
T: 020 3301 8069
Map

We happened upon this place completely by chance on a Friday night. Over a drink at the Hampshire Hotel in Leicester Square, we contemplated finding a restaurant which might approach the Hampshire’s level of civilisation in an area which, let’s face it, is not the first place you think of for a quality meal. A quick search on the internet revealed a hidden gem – an outpost of the well-known St John restaurant hidden amongst the casinos and fast food joints.

The restaurant is a large square room with an open kitchen all along one side. The room was buzzing with conversation and the staff were similarly chatty. We chose 6 rock oysters and a beetroot, sorrel, walnut and boiled egg salad to start. The oysters were big and meaty and the salad was very satisfying, with purple and golden beets that had been cooked to perfection, not crunchy but still offering some resistance. As we ate our starters we watched the chefs beavering away, one of them stopping only to slake his thirst with a large bottle of water before returning to the stove.

For the main course we couldn’t resist the ox cheek pie, which was for a minimum of two people. The waiter recommended a bottle of Bandol 2006 for this adventure, which was an excellent choice – a bold wine with plenty of tannins that had no problems standing up to the rich gravy that accompanied the pie. The suet pastry on the pie was simply superb, and we had no trouble finishing it.

We didn’t have much room for dessert but we did manage to squeeze in a honeycomb ice cream. This was excellent but we did rue the missed opportunity for some post-dinner cheese. Next time.

All in all, an excellent experience. This is an oasis of sanity in a strange part of town. I wonder whether the diners at the Aberdeen Angus know what they are missing. The bill was was £136 for two including a £54 bottle of wine.

Opera Tavern

Opera Tavern

23 Catherine St
London
WC2B 5JS
T: 020 7836 3680
Map

Another excellent meal from the team behind Dehesa. Service is always delivered with a smile here and the waitress offered to let us try a taste of the wine from the specials board, a 2008 Barbera D’Alba, which we agreed was worth having a bottle of at £38.

We started off with the Three Manchegos with quince, which were surprisingly different from each other, each having their own character, and were served with some very thinly-sliced and then toasted bread. We also got a bowl of crispy pigs ears, some fresh bread with a very green, grassy olive oil and a board of Jamon Iberico – a bit pricey at £14 but worth every penny!

Next we moved on to arancini which were filled with wonderfully smooth warm goats cheese, and a square of pork belly which was successfully if somewhat reluctantly divided 3 ways – would recommend ordering 1 each to avoid confrontation. We finished our main meal with Lamb Gigot served with pumpkin purée and braised chicory, and a warm salad of romanescu which was beautifully presented and it seemed a shame to ruin it although we were glad we dug in!

There were 4 desserts on the menu, each paired with a different dessert wine. We briefly considered getting another Three Manchegos before deciding on the caprine and amaretti cheesecake, the Turron ice cream with rhubarb, and the dark chocolate ganache with beetroot ice cream and hazelnut crumble. The standout winner was the ganache – we don’t know how they did it but the combination of slightly bitter chocolate with slightly sweet beetroot and a bit of hazelnut matched absolutely perfectly with the suggested pairing of Pedro Ximenez.

The bill was £52 a head which was roughly half food and half drinks/service. We’ll be back here again before long.

The Three Horseshoes

The Three Horseshoes

Horseshoe Road
Bennett End, Nr Radnage
High Wycombe
HP14 4EB
T: 01494 483273
Map

We arrived in the dark on Friday evening and were shown to a quaint little room overlooking a small pond. After freshening up quickly, we went back to the main building for dinner. The restaurant was busy but not full and we were given a choice of tables. The fresh bread rolls were warm and came with butter that was soft enough to spread (which is always nice!). The menu had five or six starters and main courses with plenty of choice for all tastes. To start we had pan-fried scallops with crispy pork belly (two of my favourite things!) and the duck breast with parma ham and a poached egg. For the main course we chose the fish plate, which was enormous (Gravalax, Smoked Salmon, White Crab Meat Salad, Smoked Trout and Tempura Prawns!), and the 28 Day Aged Sirloin Steak, which was flavoursome and came with chunky chips and peppercorn sauce. To finish off the evening, we shared a cheeseboard that wasn’t particularly exciting and two very small glasses of Sauternes.

In the morning, despite the rain, we were able to appreciate the lovely view over the Chilterns, but overall we felt the experience could have been better. We got the impression that the management are resting on their laurels and coasting on previous accolades. The room we stayed in, the breakfast dishes and the restaurant floor all could have been cleaner (I don’t expect to see leftover chips at breakfast) and the dining tables less wobbly. With a little attention to detail and a renewed passion, I think The Three Horseshoes could be much better.

Introduction
You do not need to be an accomplished chef to attempt to construct this dish. In fact, you do not need to know anything about cooking at all. It would probably be better if you were a simple bricklayer. Just follow the instructions, stay true to your quest, and you shall be rewarded with the finest lasagne in all the land. Good luck.
Ingredients
6 sheets fresh lasagne
1 aubergine
1 bag spinach
300g asparagus
1 large red onion
100g sun-dried tomatoes
300g mozzarella
200g mexicana cheese, or substitute cheddar with chilli flakes
1 large jar white lasagne sauce (700g)
1 bag fresh basil
1 bag fresh coriander
3 cloves garlic
soy sauce
freshly ground black pepper

Tools
ovenproof rectangular dish – 12″ x 8″ x 2″ deep
a second dish of similar size for holding hot water
large non-stick frying pan
small shallow pan
plastic potato masher
garlic press
steamer, grill or microwave for softening asparagus
colander
spatula
kettle
knife and chopping board

Preparation
These can be done simultaneously depending on your competence and number of helpers. When each bit is done you can simply set it to one side until needed. If you are really motoring this can all be done in 30 minutes. Give yourself 40 and enjoy a nice glass of wine while you do it.

1. Press the garlic into a small shallow pan. Chop the onions and sun-dried tomatoes and add to the pan. Add a bit of olive oil if your tomatoes are not already drenched in it and fry on a low heat until the onions are soft but not brown.

2. Heat a large non-stick frying pan on a high heat. Slice the aubergine into half-centimetre slices and add to the pan in a single layer. Douse with soy sauce and after a few minutes press the aubergine using a plastic potato masher, being careful to hold the pan steady. You should be looking to gently crush the aubergine so that it gives up its moisture and starts to fry in its own juices. Flip the aubergine slices as necessary and fry until browned on both sides. Continue until all slices are done.

3. Steam the asparagus for 5 minutes to soften it up. Alternatively, put under a grill for 10 minutes. As a last resort, microwave for 3 minutes. If you have bought fine asparagus then this step is not necessary.

4. Wash the spinach and place in a colander. Pluck the leaves from the basil and mix with the spinach. Pour over a litre of hot water from the kettle and mix gently with a spatula so that all of the spinach wilts.

5. Slice the mozzarella and mexicana – the mexicana needs to have enough area make a single layer in your dish and the mozzarella, two. You might find the mozzarella doesn’t look enough – don’t worry, you can leave gaps and it will melt.

6. Roughly chop the coriander.

7. Fill the second shallow rectangular pan or dish with hot water from the kettle, and dunk your fresh lasagne sheets in there to make them malleable.

8. Preheat the oven to 180C.

Construction
This is from the bottom up. At each stage you should be looking to minimise the amount of air in the dish by packing the ingredients tightly together. After each layer of lasagne you can even press down evenly across the whole dish to squish everything together. Shouldn’t take more than 10 minutes.

1/4 jar of white sauce – spread evenly
2 sheets of fresh lasagne side-by-side but overlapping
spinach and basil
1/2 of the mozzarella
generous black pepper
1/4 jar of white sauce – spread evenly
2 sheets of fresh lasagne side-by-side but overlapping
tomatoes, garlic and onion
coriander
aubergine – lay slices flat, try to fill the available space
other 1/2 of the mozzarella
generous black pepper
1/4 jar of white sauce – spread evenly
2 sheets of fresh lasagne side-by-side but overlapping
asparagus
1/4 jar of white sauce – spread evenly
mexicana cheese

If you have any ingredients left at this stage, you have failed. Go back to “Introduction”.

Cooking
Put it in the oven for 40 mins at 180C. If you like the top layer a bit browner and crispier, turn it up to 200C with 10 minutes to go.

Serving suggestion
Trust me, you do not need chips. A nice green leaf salad with a simple balsamic and olive oil dressing, and maybe a halved tomato or two should be ample.

Variations
Try adding any of the following:

  • pan-fried courgettes or peppers
  • broccoli
  • black olives
  • sliced artichokes in oil
  • stir-fried Mexican chicken (caution: may not be strictly vegetarian)