Feeds:
Posts
Comments

Archive for the ‘Baking’ Category

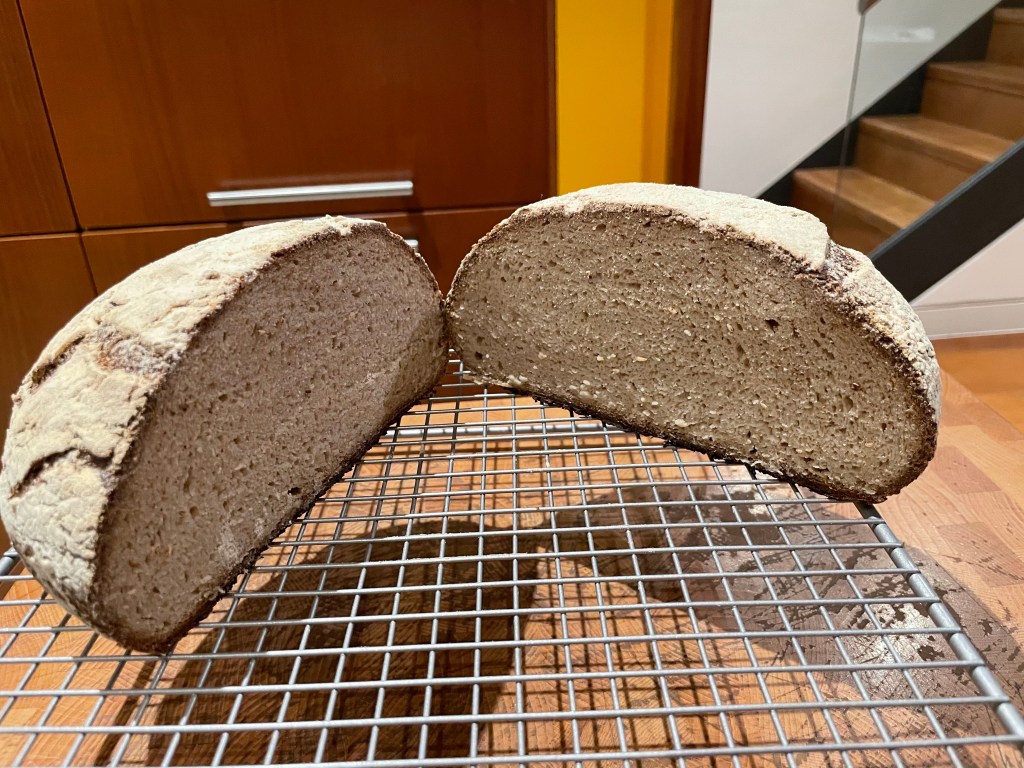
My project for Lockdown 3.0 was to master gluten free sourdough. I had been making sourdough since the first lockdown but my husband had never been able to enjoy it because he has a gluten intolerance. I thought it would be a fun challenge to make a gluten free version, but also thought why not give it a try!

Although many of the principles and processes for GF sourdough are the same as for traditional sourdough (see How to Sourdough for details on equipment and starter maintenance) there are a few key points that differ:

  1. The flours used need to be gluten free and you’ll need more different kinds – I use white rice, teff, quinoa, sorghum and tapioca + psyllium husk
  2. No need to pull and fold – just wait!
  3. No gluten means everything is so much easier to clean up!

Starter

As with a gluten-based sourdough, you’ll need a starter. This part takes a few days (possibly up to a week depending on the flours you use and the temperature you keep your starter at). I used this Guardian article and the freee Guide to Gluten Free Sourdough Making as resources and settled on a mix of three flours:

10g white rice flour
10g teff flour
10g quinoa flour
30g water – I use tap water that has been boiled and cooled

Mix in a glass (or plastic) jar and put in a warm place. As per the Guardian article, repeat the feeding and discarding daily until you start to see bubbles. After baking, I keep the leftover starter in the fridge until I want to bake again – taking it out the morning of the day before I want to bake, feeding it once and then giving it a big feeding at 5:30pm. It’s important to make sure you have enough starter to make the pre-ferment as well as have some leftover so you don’t have to start from scratch every week. I target around 200g of starter before baking.
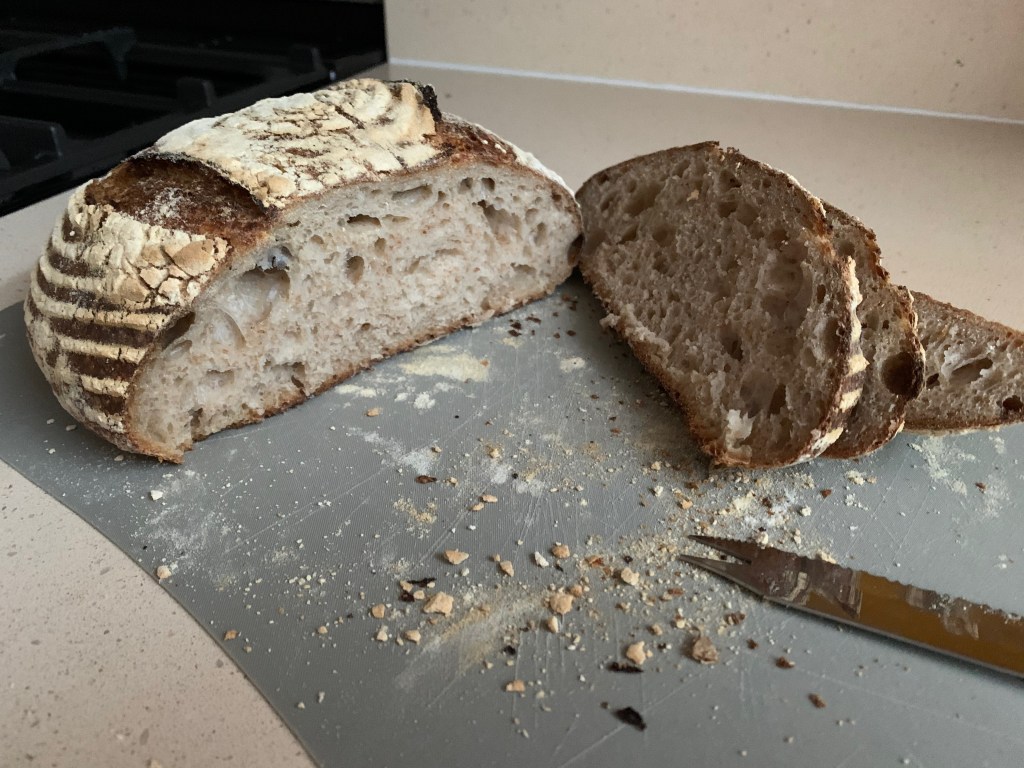
Bread

I follow the recipe from the Guardian or the original on georgeats.com (which also has loads of resources and information on it) but I increase the quantities by 50% to get a bigger loaf.

Read Full Post »

How to Sourdough

So, someone gave you some sourdough starter and now you feel the need to try to make bread. And you should… because it’s a great experience and there is no better way to learn that £4 for a loaf from a bakery is a bargain. Joking aside, it’s not really that hard and although there is a long elapsed time (spoiler… it takes a few days) there isn’t that much active work involved and having your own fresh sourdough is a real treat.

What you will need

Before you start this adventure, make sure you have:

  • a kitchen scale
  • at least one small glass jar with a lid – weigh it empty and write down how much it weighs
  • white and wholemeal bread flour – it’s important to have “bread flour” and not just regular flour
  • a proofing basket or banneton – you could just use a mixing bowl, but if you want the nice pattern on your loaf, you’ll need a banneton
  • a heavy crockpot that you can put in the oven – a Le Creuset crock pot works well if you have it

Maintaining your starter

Your starter will survive in the fridge for weeks without any attention. This is good. It means you can still go on holiday, forget to bake, and have a normal life. If I’m not planning to bake, I take mine out once per week, let it warm up for an hour or so, feed it, leave it out for a few hours and then put it back in the fridge. I pretty much follow the Refrigerator Maintenance method from Food52.

The biggest thing to get used to is discarding most of your starter every time you feed it. Yes, that’s right you need to get rid of most of it. You can throw it out or you can put it in another container and keep it in the fridge and make other yummy things from it like these Banana Nut Muffins or Pancakes. Or you can put it in another container in the fridge and then once in a while just throw it all out at once – this is what I typically do. Although I have had those muffins and they are amazing!

Feeding your starter

Feeding your starter means discarding most of it and giving it more flour and water. I keep 30g of starter and add 30g of water (I use previously boiled and cooled tap water) and 30g of white bread flour. I find this means I don’t have to waste too much flour week to week and I have more than enough starter to make one loaf of bread (the Food52 recipe takes 10g of starter).

If you know how much your jar weighs, this process is much easier. Get out your scale and put your jar on it. Next you’ll want to scoop or pour out starter until you have the weight of the jar + 30g remaining. Tare the scale and add 30g of water. Stir until dissolved and smooth. Tare the scale and add 30g of flour. Stir until smooth. Leave on counter for a few hours until it’s bubbly. If you’re not baking this week, return it to the fridge until next week.

Making your bread

I follow the Table Loaf recipe from Food52. The video is a great way to see how to actually do the various techniques and her voice is so soothing to listen to.

Timeline

Day 1: Take starter out of fridge sometime in the morning, let it warm up, feed it and leave on counter. Feed again in evening.

Day 2: Feed starter sometime around midday. Make leaven in the evening (step 1 from the Table Loaf recipe).

Day 3: Make the dough (steps 2 to 5 from the Table Loaf recipe).

Day 4: Bake. Be sure to let your loaf cool for at least 2 hours to allow the crumb to form properly.

Read Full Post »

These little ghosts are adorable, easy to make and super-tasty! Credit for the recipe goes to SkinnyTaste.


Meringue Ghosts

Makes 36

Preheat oven to 400°F/200°C. Place rack in the center of the oven. Line a baking sheet with parchment paper. Have a pastry bag fitted with a 1/2 inch plain tip.

The little beauties!

4 large egg whites, room temperature
1/4 tsp cream of tartar
1 cup superfine sugar (or put sugar in food processor for 30 seconds until fine)
1/2 tsp pure white vanilla extract
miniature chocolate chips for the eyes

In your mixing bowl, using the whisk attachment, beat the egg whites on low-medium speed until foamy. Add the cream of tartar and continue to beat until you get very stiff peaks. Beat in vanilla extract.

Add the sugar, a little at a time, and continue to beat until the meringue holds very stiff peaks. Beat in the vanilla extract.

Before placing the meringue ghosts on the cookie sheet, place a little of the meringue on the underside of each corner of the parchment paper to prevent the paper from sliding.

Transfer the meringue to the pastry bag. Holding the bag perpendicular to the baking sheet, pipe with even pressure, 2 inch high mounds of meringue.

Carefully press two miniature chocolate chips into each meringue ghost for the eyes, and a third chip for a mouth.

Bake the meringues for approximately 1 1/4 – 1 1/2 hours or until they are dry and crisp to the touch and easily separate from the parchment paper. Turn off the oven, slightly open the door, and leave the meringues in the oven to finish drying several hours, or even overnight.

Keeps for several days at room temperature.

Nutritional Info: Size: 1 ghost
Old Points: 1 pts
Points+: 1 pts
Calories: 27.5
Fat: 0.3 g
Protein: 0.4 g
Carb: 6.1 g
Fiber: 0.1 g
Sugar: 5.9 g
Sodium: 6.4 mg

Read Full Post »

If you love pecan pie and pumpkin pie, this is the pie for you! Great for Thanksgiving or any time you want sugar hit!

I made this fabulous pie for Canadian Thanksgiving last weekend. It’s based on Libby’s Pumpkin Pecan Pie, but with a few modifications.

First things first.. the pumpkin… In the past when I’ve made pumpkin pie, I’ve always cooked the pumpkin myself and then pureed it. Unfortunately, I’ve found that the resulting pies were often soggy. When researching pie recipes this year, I found a great tip from Keri Fisher:  after pureeing the pumpkin, put it back in the oven spread thinly on a cookie sheet and roast it until it gets drier and thicker.  My pie was not in the slightest big soggy.. I think this tip made all the difference.  And before we start, I’ll admit that I didn’t make my own crust. I bought all-butter frozen shortcrust pastry from Waitrose. 🙂


Pumpkin Pecan Pie

Preparation time: 20 mins + 50 mins cooking time (assuming you already have the pastry and pumpkin prepared).
Makes one 9-inch pie.

Pumpkin Pecan Pie

1 (9 inch) unbaked (4-cup volume) deep-dish pie shell
250 g pumpkin puree (see note above)
65 g brown sugar
1 large egg
2 g pumpkin pie spice (nutmeg, cinnamon and cloves)

160 ml honey
100 g brown sugar
2 large eggs
45 g butter or margarine
3 ml vanilla extract
120 g pecan halves

Preheat oven to 350°F/175°C.

1. COMBINE pumpkin, sugar, egg and pumpkin pie spice in medium bowl; stir well. Spread over bottom of pie shell.

2. COMBINE honey, sugar, eggs, butter and vanilla extract in same bowl; stir in nuts. Spoon over pumpkin layer.

3. BAKE for 50 minutes or until knife inserted in center comes out clean. Cool on wire rack.

Serve with freshly whipped cream and enjoy!

Read Full Post »

This weekend I decided to tackle the growing collection of frost in the freezer. At the back of the freezer, long forgotten about, I found two ripe bananas which I had been saving for banana bread. Since it was a lovely fall weekend, I thought some baking was in order.

This recipe is based on Quick Banana Bread from The Joy of Cooking with a few modifications. When my brother and I were growing up, the Joy was one of our favourite cookbooks. With instructions on how to skin a squirrel and recipes that make 200 cookies, the Joy is sure to be a hit with young chefs. We would pore over it for hours before deciding to make some obscure cookies, candies or a cake. Mom never questioned our choices and was always supportive of our efforts, even when we really did make 200 German Honey cookies.

This recipe requires less cooking time than many others I have seen and is very easy. Enjoy it while it cooks and fills the house with a wonderful aroma, hot out of the oven with butter melting on it or the next day for breakfast (if there’s any left!)


Banana Bread

Preparation time: 15 mins + 45-60 mins cooking time.
Makes one loaf.

1 3/4 cups sifted all-purpose flour
2 1/4 teaspoons double-acting baking powder
1/2 teaspoon salt

1/3 cup butter or margarine
2/3 cup brown sugar
Grated rind of one lemon

2 beaten eggs
1 to 1 1/4 cups of ripe banana pulp

1/2 cup chopped walnuts

Preheat oven to 350°F/175°C.

1. In a medium mixing bowl, sift together the flour, baking powder and salt.

2. Blend the butter, sugar and lemon rind in a large mixing bowl until creamy.

3. Beat the eggs and banana pulp into the butter and sugar mixture.

4. Add the sifted ingredients to the sugar mixture in 3 parts, beating until smooth after each addition.

5. Fold in the walnuts.

6. Pour the batter into a greased loaf pan.

Bake for 45 – 60 mins until a toothpick comes out clean.  Cool slightly before sneaking the first hot slice.

Read Full Post »

Apologies.. it has been a long time since I’ve written a new post. I’ve been busy finishing up my PhD and unsurprisingly didn’t have any spare writing time. I’ve now pretty much finished it and have started work full-time. I’m planning to return to my blogging and enjoy cooking again. Earlier this week I had a craving for blueberry muffins so on Friday I bought some blueberries on my way to work and today I made some yummy blueberry muffins. I used the site NutritionData.com to calculate the nutritional information which I must admit was much worse than I had thought. I did use reduced-fat butter so the numbers should probably be a bit less than those quoted for my muffins. Feel free to use margarine or other reduced fat spread.


Blueberry Muffins

Makes 12 muffins.

Blueberry Muffins

1/2 cup butter
1 1/4 cups brown sugar
2 eggs
2 cups all-purpose flour
2 teaspoons baking powder
1/2 teaspoon salt
1/4 cup milk
2 1/2 cups fresh blueberries

1. Preheat oven to 375 degrees F (190 degrees C). Grease and flour muffin pans or use paper liners.

2. In a large bowl, cream butter and sugar until light and fluffy. Add eggs one at a time and mix in.

3. Mix flour, baking powder and salt. Add flour mixture, alternating with milk. Mash 1/2 cup berries and stir into batter. Fold in remaining berries.

4. Fill muffin cups. Bake for 20 minutes. Remove from oven and wait 5 minutes to remove from pans.

Per Muffin: 222 kcals, 9g fat(5g saturated), 4g protein, 36g carbs, 718g sugar, 0.6g salt.

Read Full Post »