Feeds:
Posts
Comments

Archive for the ‘Main Courses’ Category

Introduction
You do not need to be an accomplished chef to attempt to construct this dish. In fact, you do not need to know anything about cooking at all. It would probably be better if you were a simple bricklayer. Just follow the instructions, stay true to your quest, and you shall be rewarded with the finest lasagne in all the land. Good luck.
Ingredients
6 sheets fresh lasagne
1 aubergine
1 bag spinach
300g asparagus
1 large red onion
100g sun-dried tomatoes
300g mozzarella
200g mexicana cheese, or substitute cheddar with chilli flakes
1 large jar white lasagne sauce (700g)
1 bag fresh basil
1 bag fresh coriander
3 cloves garlic
soy sauce
freshly ground black pepper

Tools
ovenproof rectangular dish – 12″ x 8″ x 2″ deep
a second dish of similar size for holding hot water
large non-stick frying pan
small shallow pan
plastic potato masher
garlic press
steamer, grill or microwave for softening asparagus
colander
spatula
kettle
knife and chopping board

Preparation
These can be done simultaneously depending on your competence and number of helpers. When each bit is done you can simply set it to one side until needed. If you are really motoring this can all be done in 30 minutes. Give yourself 40 and enjoy a nice glass of wine while you do it.

1. Press the garlic into a small shallow pan. Chop the onions and sun-dried tomatoes and add to the pan. Add a bit of olive oil if your tomatoes are not already drenched in it and fry on a low heat until the onions are soft but not brown.

2. Heat a large non-stick frying pan on a high heat. Slice the aubergine into half-centimetre slices and add to the pan in a single layer. Douse with soy sauce and after a few minutes press the aubergine using a plastic potato masher, being careful to hold the pan steady. You should be looking to gently crush the aubergine so that it gives up its moisture and starts to fry in its own juices. Flip the aubergine slices as necessary and fry until browned on both sides. Continue until all slices are done.

3. Steam the asparagus for 5 minutes to soften it up. Alternatively, put under a grill for 10 minutes. As a last resort, microwave for 3 minutes. If you have bought fine asparagus then this step is not necessary.

4. Wash the spinach and place in a colander. Pluck the leaves from the basil and mix with the spinach. Pour over a litre of hot water from the kettle and mix gently with a spatula so that all of the spinach wilts.

5. Slice the mozzarella and mexicana – the mexicana needs to have enough area make a single layer in your dish and the mozzarella, two. You might find the mozzarella doesn’t look enough – don’t worry, you can leave gaps and it will melt.

6. Roughly chop the coriander.

7. Fill the second shallow rectangular pan or dish with hot water from the kettle, and dunk your fresh lasagne sheets in there to make them malleable.

8. Preheat the oven to 180C.

Construction
This is from the bottom up. At each stage you should be looking to minimise the amount of air in the dish by packing the ingredients tightly together. After each layer of lasagne you can even press down evenly across the whole dish to squish everything together. Shouldn’t take more than 10 minutes.

1/4 jar of white sauce – spread evenly
2 sheets of fresh lasagne side-by-side but overlapping
spinach and basil
1/2 of the mozzarella
generous black pepper
1/4 jar of white sauce – spread evenly
2 sheets of fresh lasagne side-by-side but overlapping
tomatoes, garlic and onion
coriander
aubergine – lay slices flat, try to fill the available space
other 1/2 of the mozzarella
generous black pepper
1/4 jar of white sauce – spread evenly
2 sheets of fresh lasagne side-by-side but overlapping
asparagus
1/4 jar of white sauce – spread evenly
mexicana cheese

If you have any ingredients left at this stage, you have failed. Go back to “Introduction”.

Cooking
Put it in the oven for 40 mins at 180C. If you like the top layer a bit browner and crispier, turn it up to 200C with 10 minutes to go.
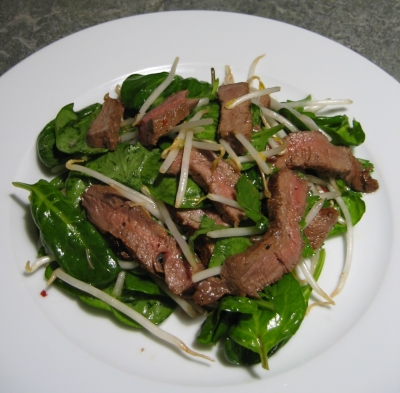
Serving suggestion
Trust me, you do not need chips. A nice green leaf salad with a simple balsamic and olive oil dressing, and maybe a halved tomato or two should be ample.

Variations
Try adding any of the following:

  • pan-fried courgettes or peppers
  • broccoli
  • black olives
  • sliced artichokes in oil
  • stir-fried Mexican chicken (caution: may not be strictly vegetarian)

Read Full Post »

This is one of Rob’s all-time favourites. It’s always a joy to watch his eyes light up when we’re on the way home from work and he asks “what’s for tea?” and I get to say “Seafood Risotto”. I usually make it with Sainsbury’s Seafood Collection which is a mixture of cooked mussels, king prawns and squid rings, because its easy and relatively cheap, but I’m sure it would be wonderful with lots of other seafood too.

I’ve been experimenting with this recipe for ages. Sometimes I add a bit less lemon or a bit more cheese. I’ve also used red wine as a substitution for white, which I don’t recommend. Apart from turning it a wierd colour, it just didn’t taste right. The parsley isn’t essential, and could be curly rather than flat if that’s what you have. If I have some asparagus on hand, I like to grill it with some olive oil, salt and pepper, cut it into one inch pieces and stir it in at the end.


Seafood Risotto

Serves 2.

Seafood Risotto

2 1/2 tbsp butter
1 medium onion, chopped
fresh ground black pepper
2 cloves garlic, minced
150g arborio rice
1/2 cup white wine
2 1/2 to 3 cups of stock, chicken or vegetable
235g (or more) mixed seafood, cooked
juice of 1 lemon
1/2 cup freshly grated parmesan
2 tbsp chopped flat leaf parsley

1. Melt the butter in a large heavy-bottom saucepan over medium-high heat. When the butter is melted add the chopped onion and cook until almost translucent. Add a few grindings of black pepper and the minced garlic.

2. Just before the garlic starts to brown, add the rice and stir well. Keep stirring until the rice has absorbed most of the butter and the pan is almost dry.

3. Add the white wine and turn down the heat a notch. When the wine is almost absorbed, add 1/2 cup of stock. Stir frequently adding the rest of the stock in approximately 1/2 cup portions until the liquid is almost all absorbed. If the rice is still a bit hard, add any seafood juice from the packet or some hot water and cook until it is absorbed.

4. Add the lemon juice and stir for a few more minutes. Add the seafood and a bit more pepper.

5. Just before serving, stir in the parmesan and the parsley.

6. Serve up in bowls with some extra parmesan and a bit more parsley as a garnish.

Read Full Post »

Gratineed Gnocchi with Spinach andĀ RicottaI made this yummy recipe from Gourmet magazine the other night with a pack of store-bought gnocchi in my cupboard. I had been struggling to come up with what to do with them and was drawn to this recipe because it wasn’t gorgonzola or tomato based as most gnocchi recipes seem to be.

I followed the recipe on the Gourmet site except for two substitutions. I used a few tablespoons of single cream topped up with milk because I didn’t have any double cream on hand and because it was healthier. This did make it a bit more watery though and I had to cook the cream sauce for a bit longer. I also didn’t have any mozzarella, strangely I find it hard to get in the UK because all the stores seem to have is fresh mozzarella, so I substituted some grated cheddar.

The recipe says it serves four, but I had half of it the first night with a green salad and the rest for supper the next night.

Read Full Post »

Delicious Big Bowl – Quinoa

I’m moving out of my flat in a few weeks and I’ve been trying to use up some of my many opened bags of grains in the cupboard. I have paella rice, risotto rice, wild rice, basmati rice, long grain brown rice, buckwheat groats, quinoa, millet and bulghur. I made kasha for breakfast the other day and today I decided it was a day for quinoa so I had a quick search on 101cookbooks.com for quinoa. I have previously made Heidi’s Lemon Scented Quinoa Salad and it was fab so I had high hopes for the Delicious Big Bowl – Quinoa. And let me say, it did not disappoint.

I substituted some green beans and a courgette for the asparagus, toasted some pine nuts and for the dressing I used lemon juice, parmesan and freshly ground pepper. I wouldn’t normally think to put potatoes with quinoa, but the textures and flavours in this recipe combined wonderfully. I’ve just eaten a big bowl for supper and am looking forward to eating the rest for tomorrow’s lunch. It was one of those meals where I constantly thought” wow how good is this”. Thanks Heidi for another great recipe. You’ve really perked up my day.

Read Full Post »

Pork Stroganoff

Tim made this Pork Stroganoff recipe for me last week from the BBC Food website. We didn’t have any blue potatoes, so he used some white ones in the pantry. He also added some sliced runner beans which went very nicely. I find that pork can often be quite dry when cooked, but I liked this recipe because there was lots of good sauce.

Read Full Post »

Mustard-crusted Tofu with Kale and Sweet Potato

Mustard-Crusted Tofu with Kale and Sweet Potato

I came across this Bon Appetit recipe in my weekly Epicurious Recipe Flash a few weeks ago. I’m always looking for new tofu recipes and I had some wholegrain mustard in the fridge that I needed to use up so I thought I’d give it a try. I made sure to dry the tofu well as recommended by lots of the reviews on the Epicurious site to make sure the mustard would stick. Some of the mustard seeds did fall off, but I just poured the crispy seeds from the pan on top at the end and they were great. I thought this recipe would have a strong mustardy taste, but there was actually very little mustard flavour in the end. I thought the lime juice went really nicely with the kale but next time I would put the kale in nearer the end. By the time the sweet potato was cooked the kale was overdone. The recipe says to grill the tofu for 2 minutes on each side but I found that to get a nice crust on it took at least 5 minutes a side. Although the recipe says it makes four servings, I only had enough kale and sweet potato for two servings using their amounts.

In short, interesting flavours and good way to eat kale, a source of calcium, iron and lots of other minerals.

Read Full Post »

This is another great recipe from delicious magazine (July 2007). I have made it four times and it is always a crowd pleaser. Usually I stick to the recipe below, but when I was staying at my dad’s we didn’t have Thai fish sauce, baby spinach or a red chilli that was big enough. For the fish sauce I substituted anchovy paste and we used salad greens in place of the spinach. I think the fish sauce tasted better than the anchovy paste, but it will do in a pinch. We only had a small bit of red chilli so I cut up some jalapeno peppers as well. They weren’t overly hot but they added a bit of crunch and I thought they were a nice addition. If you don’t want chilli on your hands for days, use a glove or small plastic bag to hold the chilli while you cut it up.

Since there are not many calories or carbs in this dish, I serve it with brown rice on the side so people who aren’t watching their carb intake can make it a larger meal.

Make sure you buy good steak and don’t overcook it. If it is juicy and tender it will melt in the mouth.


Thai-style Beef with Spinach

Serves 4.
Ready in 20 minutes.

Thai-style Beef with Spinach

400g fillet or sirloin steak, sinew and excess fat removed
4 tbsp reduced-salt soy sauce
1 tsp groundnut or vegetable oil
100g beansprouts
1 large shallot or 3 spring onions, trimmed and thinly sliced
175g baby leaf spinach
Handful fresh coriander leaves

For the dressing:

1 small red chili, deseeded and thinly sliced
2 tbsp Thai fish sauce (nam pla)
1 tbsp groundnut or vegetable oil
juice of 2 limes
1 tsp caster sugar

1. Cut the steak into 2 long strips and put into a bowl. Add the soy sauce, season with freshly ground pepper, toss to coat evenly and set aside for 5 minutes.

2. Heat the oil in a large, non-stick frying pan over a medium-high heat. Add the steak and cook for 2 minutes on each side, until charred and and cooked medium-rare (cook for longer if you like). Transfer to a plate to rest for 10 minutes.

3. Meanwhile, make the dressing by whisking the dressing ingredients together in a large bowl.

4. Add the beansprouts, shallot or spring onions, spinach and coriander leaves. Thinly slice the beef, add to the salad and gently toss together.

Serve immediately.

Per Serving: 222 kcals, 11.2g fat(3.8g saturated), 24.7g protein, 8.1g carbs, 7.2g sugar, 1.7g salt.

Read Full Post »

Broccoli, sultana and chilli penneI found this recipe in the August 2007 issue of delicious magazine. Always in search of my creative and healthy ways to eat pasta, I was intrigued by this low-fat and low-salt recipe. Like a few other recipes I’ve seen recently, it uses chilli and lemon to add fat-free flavour. I went for the meaty variation and added some bacon as extra protein (and fat unfortunately). I used multi grain bread instead of ciabatta for the crumbs because I had some that needed using up. I had lots of extra Parmesan crumbs, which kept I kept in a sealed container. When I made this recipe for a second time the next week (for a different crowd of course!), I used up the leftover Parmesan crumbs, but they would also go well on a salad on top of other pasta dishes.


Broccoli, Sultana and Chilli Penne with Parmesan Crumbs

Serves 4.
Ready in 20 minutes.

350g penne
50g ciabatta bread, roughly torn
2 tbsp olive oil
20g vegetarian Parmesan, finely grated
1 small onion, finely chopped
250g tendersterm broccoli, cut into bite-size chunks
2 garlic cloves, sliced
1/2 large red chilli, deseeded and chopped
25g sultanas
2 tbsp chopped fresh curly parsley
Grated zest and juice of 1 lemon

1. Cook the penne according to the packet instructions, until al dente.

2. Meanwhile, preheat the grill to medium and line the grill pan with foil. Mix the torn bread with half the oil in a bowl and season with black pepper. Spread out on the grill pan and grill for 2-3 minutes, turning frequently, until crisp and golden. Cool slightly, transfer to a blender and whizz to coarse crumbs. Stir in the Parmesan.

3. Heat the remaining oil in a large frying pan over a medium heat. Add the onion and cook for 5 minutes, until softened. Add the broccoli, garlic, chilli and sultanas, until the broccoli is tender – add a splash of water to prevent it catching.

4. Drain the pasta and add to the pan with the parsley and lemon zest and juice. Season, toss, then divide between 4 bowls. Top with the toasted Parmesan crumbs to serve.

Per serving: 457 kcals, 9.8 fat (2.2g saturated), 17.2 protein, 80.1g carbs, 8.9 sugar, 0.3g salt

Variation: For a meaty version, fry some chopped bacon or chorizo along with the onion.

Read Full Post »

When I was growing up we raised free-range organic chickens, which meant we usually had a good supply of chicken in the freezer. These days you can buy free-range organic chickens and chicken pieces in supermarkets but it’s still not the same as chicken you’ve raised yourself.

From my mom’s cookbook, this is one of my dad’s favourites. I made this tonight for Tim who thought he only needed one piece but then he tasted it.. and soon returned to the kitchen to get another.


Chicken Farmer’s Chicken

Serves 4.

Usually entails finding a small chicken 4-6 lbs which is then cut up into pieces. The carcass is kept to make chicken soup or stew. Be wary of any situation that provides you with chicken fingers. “Cut-up” chicken pieces from a supermarket are also suitable.

1. Chicken pieces are washed and dried with paper towel.

2. In a medium sized bowl, mix enough wholewheat flour, herbs*, salt, and pepper to coat the chicken pieces – all guess work! (about 1 cup).

3. Coat the chicken by rolling pieces in bowl or sprinkle both sides lightly with coating. Then place these pieces on a rack in a broiler pan (lined with aluminum foil or greaseproof paper to facilitate clean up).

4. Melt some 20/80 or butter to lightly baste or dribble over the pieces (baste once or twice during roasting). Sprinkle with paprika and more herbs and place in oven at 325 degrees F for about 1 hour or until crispy.

Sprinkle with juice of a lemon before serving.

*Suggested herbs:
oregano or Greek oregano
summer savoury
thyme
rosemary

Read Full Post »

Grana PadanoThis recipe is from a supplement to my September delicious magazine called Modern Italian. A few of us were curious as to how Grana Padano was different from Parmesan, so my friend Denis made this for us tonight. We decided that although they seem to be quite similar, Grana Padano is milder and sweeter than Parmesan. I don’t always like chicken breasts because I find them too dry, but as the recipe says, they stayed juicy in their cheesy crust.


Pan-fried Chicken in a Grana Padano Crust

Serves 4.
Ready in 20 minutes.

Cooking chicken breasts quickly, and in a crust like this, guarantees they stay juicy and succulent. Any leftovers make a great sandwich filling with a bit of garlic mayonnaise.

Pinch of saffron threads
4 skinless, boneless chicken breasts
1 tbsp plain flour
1 large egg, beaten
4 tbsp olive oil
8 tbsp finely grated Grana Padano
1 tbsp chopped fresh thyme, plus extra sprigs to garnish
Herb mash and lemon wedges, to serve

1. Put the saffron in a bowl, add a tablespoon of boiling water and set aside for a few minutes to infuse.

2. Meanwhile, cut the chicken in half widthways to make 8 thin pieces and dust very lightly with flour.

3. Crack the egg into the bowl of saffron. Add a good grinding of black pepper and beat well.

4. Heat half the oil in a large frying pan over a medium heat. Mix the cheese and thyme together on a plate. Dip the chicken first in the egg mixture, then coat in the Grana Padano mixture. Fry in 2 batches, adding the remaining oil with the second batch, until crisp, golden and cooked through. It should take about 5 minutes each side, but don’t be tempted to lift of turn the chicken too soon or the crust might stick to the bottom of the pan.

5. Serve 2 chicken pieces each, with herb mash and lemon wedges to squeeze over. Garnish with thyme.

Read Full Post »

Older Posts »